
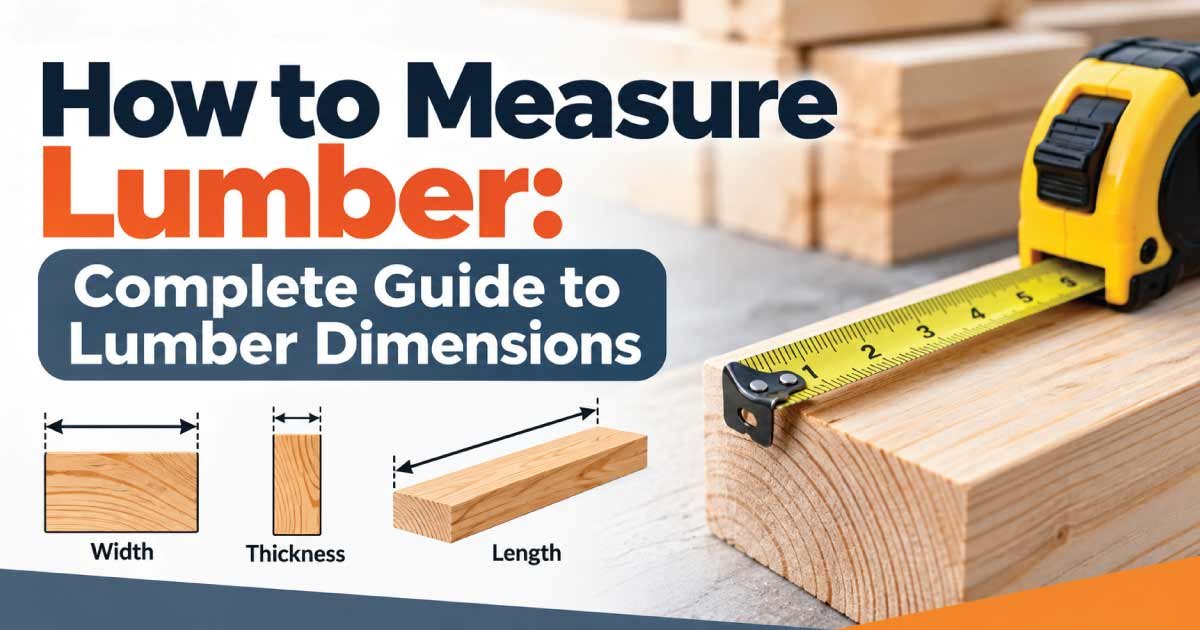
Measuring lumber correctly is an important skill for woodworking, home improvement, framing, furniture building, shelving, flooring, and many other construction projects. A board may be labeled as a 2 × 4, for example, but its finished dimensions are smaller than those numbers. Understanding this difference between nominal lumber dimensions and actual lumber dimensions can help you buy the right material, calculate quantities, and avoid costly mistakes.
In this complete guide, you will learn how to measure lumber thickness, width, and length, understand nominal versus actual sizes, calculate board feet, measure rough-sawn wood, and choose the right measuring tools. We will also cover common lumber dimensions and practical tips for getting accurate measurements.
Quick answer: To measure lumber, measure its actual thickness, width, and length with a tape measure, ruler, or caliper. Remember that standard dimensional lumber is commonly sold using nominal dimensions, while its finished actual dimensions are smaller after drying and surfacing.
What Are Lumber Dimensions?
Lumber dimensions describe the three basic measurements of a piece of wood:
- Thickness — how thick the board is
- Width — how wide the board is
- Length — how long the board is
For example, a board commonly called a 2 × 6 × 8 is nominally 2 inches thick, 6 inches wide, and 8 feet long.
However, the actual finished dimensions are normally smaller than the nominal dimensions. This happens because lumber is commonly dried and surfaced before it reaches the customer.
Understanding the difference is one of the most important parts of learning how to measure lumber.
Nominal Lumber Size vs. Actual Lumber Size
One of the most common mistakes beginners make is assuming that a board labeled 2 × 4 actually measures 2 inches by 4 inches.
A standard surfaced 2 × 4 is typically about 1½ inches thick × 3½ inches wide.
The larger numbers are called nominal dimensions, while the measurements you obtain with a tape measure are the actual dimensions.
Common Nominal and Actual Lumber Sizes
The following table shows common examples of standard dimensional lumber.
| Nominal Size | Typical Actual Thickness | Typical Actual Width |
|---|---|---|
| 1 × 2 | ¾ in | 1½ in |
| 1 × 3 | ¾ in | 2½ in |
| 1 × 4 | ¾ in | 3½ in |
| 1 × 6 | ¾ in | 5½ in |
| 1 × 8 | ¾ in | 7¼ in |
| 1 × 10 | ¾ in | 9¼ in |
| 1 × 12 | ¾ in | 11¼ in |
| 2 × 4 | 1½ in | 3½ in |
| 2 × 6 | 1½ in | 5½ in |
| 2 × 8 | 1½ in | 7¼ in |
| 2 × 10 | 1½ in | 9¼ in |
| 2 × 12 | 1½ in | 11¼ in |
| 4 × 4 | 3½ in | 3½ in |
Actual dimensions can vary depending on the lumber product, grading, manufacturing process, moisture condition, and supplier, so measure the individual board when exact dimensions matter.
Why Is a 2 × 4 Not Actually 2 × 4?
Historically, rough lumber could be closer to its nominal dimensions when first cut. After the wood is dried and surfaced, material is removed from the board.
For a typical modern 2 × 4, drying and surfacing reduce its finished size to approximately 1½ × 3½ inches.
This is why a contractor may order a 2 × 4 but use 1½ × 3½ inches when calculating the finished dimensions of a project.
The same principle applies to many common dimensional lumber sizes.
Nominal Dimensions Are Mainly a Buying Reference
Nominal dimensions make lumber easier to identify and purchase.
For example:
- A 2 × 4 identifies a familiar framing board.
- A 2 × 8 identifies a wider framing board.
- A 1 × 6 generally identifies a board approximately ¾ inch thick and 5½ inches wide.
When designing or building something that requires precise dimensions, however, use the actual measured size rather than relying only on the name of the board.
How to Measure Lumber Step by Step
Measuring lumber is simple when you follow a consistent process. The three primary dimensions are thickness, width, and length.
Step 1: Identify the Lumber Type
First determine what type of lumber you are measuring.
It could be:
- Dimensional construction lumber
- Rough-sawn lumber
- Hardwood
- Softwood
- Trim board
- Decking
- Plywood or sheet material
- Reclaimed wood
- Pressure-treated lumber
The measurement method can vary slightly depending on whether the wood has been surfaced, planed, or left rough.
Step 2: Measure the Thickness
Place your tape measure or ruler across the edge of the board.
Measure from one broad face directly to the opposite face.
For more accurate woodworking measurements, a caliper can be useful, particularly when checking thinner boards.
Record the measurement in inches, preferably to the nearest fraction that your project requires.
Step 3: Measure the Width
Place the measuring tool across the face of the board.
Measure from one side edge to the opposite side edge.
Do not assume that the width printed on the lumber label is the actual width.
For example, a typical 1 × 8 board is approximately ¾ inch × 7¼ inches, rather than a full 1 × 8 inches.
Step 4: Measure the Length
Extend your tape measure from one end of the board to the other.
Keep the tape straight and parallel with the board.
Long lumber is commonly sold in feet, such as:
- 6 ft
- 8 ft
- 10 ft
- 12 ft
- 14 ft
- 16 ft
For a precise cut list, record the exact length you measure rather than simply relying on the nominal length.
Step 5: Record Actual Dimensions
Write the dimensions in a consistent format.
For example:
1½ in × 3½ in × 96 in
or
1½ in × 3½ in × 8 ft
This prevents confusion between nominal and actual measurements.
The Three Main Lumber Measurements
This comparison demonstrates why identifying both the nominal size and actual size is useful when planning a project.
How to Measure Rough-Sawn Lumber
Rough-sawn lumber is different from finished dimensional lumber.
It may have a rough surface and dimensions that are closer to the original sawing dimensions. Depending on the supplier and lumber rules being used, rough lumber may be measured differently from surfaced lumber.
Measure Rough Lumber at the Appropriate Point
If the board has an irregular surface, determine what measurement your project actually needs.
For woodworking, you may need to know:
- Rough thickness
- Finished thickness
- Rough width
- Finished width
- Board length
- Usable dimensions after milling
If you plan to surface or plane the wood, do not assume the current rough dimension will remain unchanged.
Allow for Milling
Planing and jointing can remove material.
For example, a rough board that appears thick enough before milling may become significantly thinner after several passes through a planer.
This is particularly important when buying hardwood for furniture projects.
What Tools Do You Need to Measure Lumber?
You do not need complicated equipment for ordinary lumber measurements.
Tape Measure
A tape measure is the most useful tool for measuring:
- Board length
- Board width
- Large framing lumber
- Construction materials
Choose a tape with clearly marked fractional-inch measurements if your work requires accuracy.
Ruler
A ruler works well for short boards, small pieces, trim, and woodworking components.
A rigid ruler can sometimes be easier to use than a flexible tape when measuring small pieces.
Combination Square
A combination square can help check:
- Width
- Thickness
- Squareness
- Cut locations
- Short dimensions
It is particularly useful when working on woodworking projects.
Calipers
Calipers are useful when you need highly precise thickness or width measurements.
They are especially helpful for:
- Small boards
- Trim
- Thin stock
- Furniture components
- Checking planed lumber
Straightedge
A straightedge helps evaluate whether a board is straight and can also assist with checking dimensions along the length of a board.
How to Measure Lumber Thickness Accurately
Thickness is especially important when lumber will fit into a specific joint, opening, cabinet, frame, or assembly.
Place the measuring tool perpendicular to the board’s face.
Do not measure at an angle because an angled measurement can appear larger than the true thickness.
For rough lumber, take measurements at several locations.
Measure More Than One Point
Wood can vary along its length.
Measure near:
- One end
- The middle
- The opposite end
If the measurements differ, record the variation.
For precision work, you may want to identify the minimum usable thickness, particularly when the board will be milled further.
How to Measure Lumber Width Accurately
Width is measured across the broad face of the board.
For a rectangular board, place the tape or ruler perpendicular to the edges.
If the board is tapered, warped, or irregular, take several measurements.
Watch for Rounded or Beveled Edges
Some boards have eased edges, rounded corners, or decorative profiles.
If you are calculating the usable flat surface, measure the appropriate working area rather than including a rounded edge that cannot be used for your application.
This distinction matters when calculating material requirements for shelving, tabletops, flooring, and trim.
How to Measure Lumber Length
Length is normally the easiest lumber dimension to measure.
Place the end of the tape at one end of the board and extend it to the opposite end.
Keep the tape straight.
Nominal Length vs. Actual Length
A board sold as an 8-foot board may not measure exactly 96 inches.
Manufacturing tolerances, end cuts, defects, and trimming can affect the final usable length.
For rough construction estimates, the listed length may be sufficient.
For a precision project, measure the actual board.
Account for Damaged Ends
If an end is cracked, split, or damaged, the total physical length may not equal the usable length.
For example, an 8-foot board might technically be 96 inches long but have damaged material that you need to cut away.
When preparing a cut list, calculate usable length after removing defects.
How to Read Lumber Measurements
Lumber measurements are commonly written in several formats.
Examples include:
- 2 × 4
- 2 × 6 × 8
- 1½ × 3½ × 96
- ¾ × 5½ × 120
The first number normally represents thickness, the second represents width, and the third represents length.
However, always check whether the listed dimensions are nominal or actual.
Understanding Feet and Inches
A board may be listed as:
2 × 4 × 8
This normally means:
- Nominal thickness: 2 inches
- Nominal width: 4 inches
- Nominal length: 8 feet
Its typical finished cross-section may be approximately:
1½ × 3½ inches
How to Calculate Board Feet
Board feet are commonly used to calculate the volume of lumber, particularly hardwood.
The basic formula is:
Board Feet = Thickness (inches) × Width (inches) × Length (feet) ÷ 12
For example, suppose a board measures:
- 2 inches thick
- 6 inches wide
- 8 feet long
The calculation is:
2 × 6 × 8 ÷ 12 = 8 board feet
So the board contains 8 board feet based on those dimensions.
Board Foot Calculation Table
| Thickness | Width | Length | Board Feet |
|---|---|---|---|
| 1 in | 6 in | 8 ft | 4 |
| 2 in | 6 in | 8 ft | 8 |
| 2 in | 8 in | 8 ft | 10.67 |
| 2 in | 10 in | 8 ft | 13.33 |
| 2 in | 12 in | 8 ft | 16 |
| 1 in | 12 in | 10 ft | 10 |
When buying rough hardwood, suppliers may quote prices based on board feet, making this calculation particularly useful.
How to Measure Lumber for a Project
Before buying wood, create a cut list.
A cut list identifies the pieces required for your project and helps you calculate how much lumber you need.
Example Cut List
| Part | Quantity | Required Length | Required Width | Required Thickness |
|---|---|---|---|---|
| Side pieces | 2 | 48 in | 3½ in | 1½ in |
| Top pieces | 2 | 36 in | 3½ in | 1½ in |
| Supports | 3 | 30 in | 3½ in | 1½ in |
This type of list makes it easier to organize purchases and reduce waste.
Add a Waste Allowance
Wood can contain:
- Knots
- Cracks
- Warping
- Splits
- Crooked sections
- Discoloration
- Other defects
Cuts also create waste through the saw blade’s kerf.
For many projects, buying a little extra material is safer than purchasing exactly the calculated amount.
The appropriate allowance depends on the lumber type and project.
How to Measure Lumber for Framing
Framing projects often use standard dimensional lumber such as 2 × 4, 2 × 6, 2 × 8, and larger sizes.
When calculating framing dimensions, use the actual dimensions when determining finished wall thicknesses, openings, or connections.
For example, a standard 2 × 4 is typically approximately 1½ × 3½ inches after surfacing.
However, structural design should follow the applicable building code, engineering requirements, lumber grade, span tables, and local construction requirements rather than relying only on a simple measurement.
How to Measure Lumber for Woodworking
Woodworking generally requires greater precision than basic construction.
A difference of even a fraction of an inch can affect:
- Joints
- Cabinet doors
- Shelves
- Drawers
- Table assemblies
- Furniture alignment
- Decorative trim
Measure the Actual Board
Do not automatically design a woodworking project around the nominal lumber size.
Measure the stock you actually have.
For example, if you are building a cabinet from several boards labeled 1 × 6, measure each board because the actual dimensions may vary.
Use Consistent Reference Surfaces
When measuring or marking lumber, use a reliable reference edge or face.
This helps prevent accumulated errors when multiple pieces need to fit together.
How to Measure Lumber for Decking and Outdoor Projects
Decking boards can have different actual dimensions from their nominal descriptions.
Before calculating spacing or coverage, measure the actual board width.
For example, if a decking board is nominally 6 inches wide but its actual width is smaller, using 6 inches in your spacing calculations could produce an incorrect estimate.
Also account for:
- Gaps between boards
- Board orientation
- Expansion and contraction
- Cut waste
- Joist spacing
- Edge conditions
Always follow the manufacturer’s installation instructions for the specific decking product.
Also Read:
Common Lumber Measurement Mistakes
Accurate measurement is not difficult, but several mistakes occur frequently.
Mistake 1: Assuming Nominal Size Is Actual Size
A 2 × 4 is the classic example.
Never assume it physically measures 2 × 4 inches.
Mistake 2: Measuring Only One Location
Wood can vary in thickness and width.
For precision projects, check multiple locations.
Mistake 3: Forgetting Saw Kerf
Every saw cut removes some material.
When making multiple cuts from one board, account for the material removed by the blade.
Mistake 4: Ignoring Defects
A board can have a theoretical length that is greater than its usable length.
Inspect the entire board before creating your cut list.
Mistake 5: Mixing Nominal and Actual Measurements
If your cut list uses actual dimensions but your purchasing calculation uses nominal dimensions without accounting for the difference, errors can occur.
Use one measurement system consistently.
Nominal and Actual Lumber Dimensions Quick Reference
| Common Nominal Size | Typical Actual Size |
|---|---|
| 1 × 2 | ¾ × 1½ in |
| 1 × 4 | ¾ × 3½ in |
| 1 × 6 | ¾ × 5½ in |
| 1 × 8 | ¾ × 7¼ in |
| 2 × 4 | 1½ × 3½ in |
| 2 × 6 | 1½ × 5½ in |
| 2 × 8 | 1½ × 7¼ in |
| 2 × 10 | 1½ × 9¼ in |
| 2 × 12 | 1½ × 11¼ in |
| 4 × 4 | 3½ × 3½ in |
Important: These are typical dimensions for commonly surfaced dimensional lumber, not a guarantee that every board will have exactly these measurements.
Tips for Measuring Lumber Like a Professional
A few simple habits can make lumber measurement much more reliable.
- Measure twice before cutting.
- Use actual dimensions for precision work.
- Check several points on irregular boards.
- Keep your tape measure straight.
- Use a square when checking short dimensions.
- Record measurements immediately.
- Separate nominal dimensions from actual dimensions in your notes.
- Inspect boards for defects before calculating usable material.
- Allow for saw kerf when creating a cut plan.
- Buy extra material when waste is difficult to predict.
- Use a caliper for small, precision components.
- Check supplier specifications when exact dimensions are critical.
Frequently Asked Questions About Measuring Lumber
How do you measure a 2 × 4?
Measure its actual thickness, width, and length. A typical surfaced 2 × 4 measures approximately 1½ inches thick × 3½ inches wide. Its length should be measured from end to end.
Is a 2 × 4 really 2 inches by 4 inches?
No. A typical finished 2 × 4 is approximately 1½ × 3½ inches. The 2 × 4 designation is the nominal size used to identify the lumber.
What is the easiest way to measure lumber?
A tape measure is usually the easiest tool for length and width. For thickness and precision measurements, a ruler, combination square, or caliper can be useful.
How do you measure the width of a board?
Measure straight across the board’s face from one edge to the opposite edge. If the board is irregular or tapered, take measurements at several locations.
How do you measure board thickness?
Measure from one broad face directly across to the opposite face. For precise woodworking, use a caliper.
How do you calculate board feet?
Use the formula:
Thickness × Width × Length in feet ÷ 12 = Board Feet
For example, 2 × 6 × 8 ÷ 12 equals 8 board feet.
Should I use nominal or actual lumber dimensions?
Use nominal dimensions when identifying or purchasing standard dimensional lumber, but use actual dimensions when designing, cutting, fitting, or calculating precise project dimensions.
Why should I measure lumber before cutting it?
Because actual lumber dimensions can vary. Measuring first helps prevent incorrect cuts, poor-fitting joints, material waste, and project delays.
Final Tips for Measuring Lumber Correctly
Learning how to measure lumber starts with understanding one simple concept: the size printed on the lumber is not always the size you will measure with a tape measure.
For everyday construction lumber, learn the difference between nominal and actual dimensions. For woodworking and precision projects, measure the individual board whenever accuracy matters.
The basic process is straightforward:
- Identify the lumber.
- Measure thickness.
- Measure width.
- Measure length.
- Record the actual dimensions.
- Check for variation and defects.
- Calculate board feet when needed.
- Account for cuts, kerf, and waste.
- Confirm the measurements before cutting.
With these steps, you can measure lumber more confidently and create more accurate material lists, cut lists, woodworking plans, and construction projects.
| size | thickness | width |
|---|---|---|
| 1 × 4 | 0.75 | 3.5 |
| 1 × 6 | 0.75 | 5.5 |
| 2 × 4 | 1.5 | 3.5 |
| 2 × 6 | 1.5 | 5.5 |
| 2 × 8 | 1.5 | 7.25 |
| 2 × 10 | 1.5 | 9.25 |