
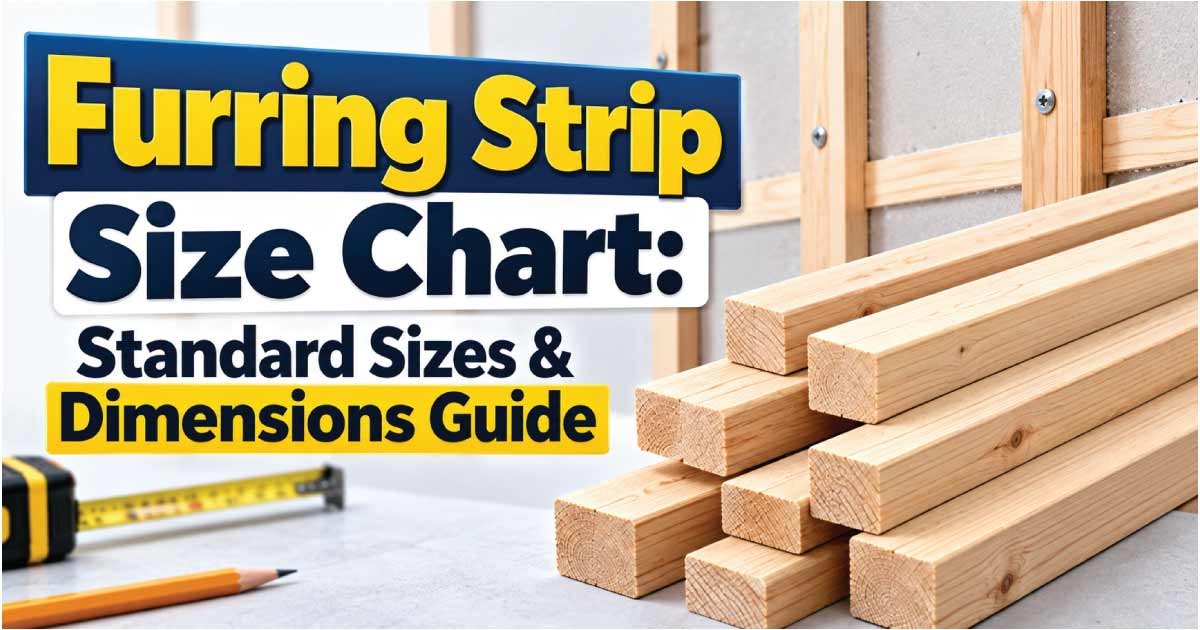
Furring strips are simple pieces of wood or other material used to create a level, even, or offset surface for installing wall coverings, ceilings, insulation, siding, panels, and other building materials. Although they look like ordinary narrow boards, selecting the correct furring strip size is important because the strip can determine the available cavity depth, fastening surface, finished wall position, and overall installation quality.
Wood furring strips are available in several common dimensional lumber sizes. The most familiar options include nominal 1 × 2 and 1 × 3 strips, although larger sections may be used when a deeper cavity or stronger fixing surface is required.
One of the most important things to understand is the difference between nominal and actual lumber dimensions. A nominal 1 × 2 furring strip typically does not measure exactly 1 inch by 2 inches after it has been surfaced. Its actual dimensions are commonly around 3/4 inch by 1-1/2 inches.
This furring strip size chart explains standard dimensions, common materials, applications, spacing, installation methods, thickness requirements, and practical tips for choosing the right furring strip for different projects.
What Is a Furring Strip?
A furring strip is a narrow strip installed over an existing surface or between structural members to provide a suitable surface for attaching another material.
Furring strips can be installed on:
- Concrete walls
- Masonry walls
- Wood framing
- Ceilings
- Roof assemblies
- Exterior walls
- Uneven surfaces
- Existing finished surfaces
They may serve several purposes depending on the project.
Common functions include:
- Creating a flat installation plane
- Providing a fastening surface
- Creating space for insulation
- Creating a service cavity
- Establishing ventilation space
- Leveling an uneven surface
- Supporting wall or ceiling finishes
- Creating separation between materials
The term “furring” describes the function rather than one specific lumber dimension.
Furring Strip Size Chart
The following chart shows common dimensional lumber sizes that may be used as wood furring strips. Actual dimensions can vary according to lumber processing and supplier specifications.
| Nominal Size | Approx. Actual Size | Common Applications |
|---|---|---|
| 1 × 2 | 3/4 × 1-1/2 in | Wall furring, panels, light-duty applications |
| 1 × 3 | 3/4 × 2-1/2 in | Wider fixing surfaces |
| 1 × 4 | 3/4 × 3-1/2 in | Cladding and larger mounting surfaces |
| 2 × 2 | 1-1/2 × 1-1/2 in | Deeper cavities and framing |
| 2 × 3 | 1-1/2 × 2-1/2 in | Support and deeper furring |
| 2 × 4 | 1-1/2 × 3-1/2 in | Heavy-duty framing or support |
These dimensions should be treated as general reference sizes. The correct furring section depends on the specific wall, ceiling, roof, cladding, insulation, or finishing system.
Nominal vs Actual Furring Strip Dimensions
Understanding lumber sizing prevents many installation errors.
Nominal Furring Strip Size
Nominal dimensions are traditional lumber labels.
Examples include:
- 1 × 2
- 1 × 3
- 1 × 4
- 2 × 2
- 2 × 3
- 2 × 4
The first number normally represents nominal thickness and the second represents nominal width.
Actual Furring Strip Size
Once lumber is dried and surfaced, its final dimensions are smaller than the nominal dimensions.
For example:
| Nominal Size | Approx. Actual Size |
|---|---|
| 1 × 2 | 3/4 × 1-1/2 in |
| 1 × 3 | 3/4 × 2-1/2 in |
| 1 × 4 | 3/4 × 3-1/2 in |
| 2 × 2 | 1-1/2 × 1-1/2 in |
| 2 × 4 | 1-1/2 × 3-1/2 in |
When precise cavity depth or finished-wall dimensions matter, use the actual dimensions of the material being installed.
Standard Furring Strip Thicknesses
Furring strips can be selected according to the amount of space they need to create.
3/4-Inch Actual Thickness
A nominal 1-inch board commonly finishes at about 3/4 inch thick.
This size is useful when only a relatively shallow offset is required.
Typical applications include:
- Interior panel installation
- Small wall adjustments
- Decorative applications
- Light-duty mounting
- Ceiling finishing
1-1/2-Inch Actual Thickness
Nominal 2-inch lumber commonly has an actual thickness of approximately 1-1/2 inches.
This provides a deeper cavity and more substantial fastening material.
Possible uses include:
- Deeper wall cavities
- Insulation support
- Exterior cladding systems
- Ceiling assemblies
- Larger mounting surfaces
Larger Furring Sections
In some applications, larger lumber sections may be used when additional depth, support, or structural capacity is needed.
These should not automatically be classified as ordinary furring strips because the design may involve framing or structural requirements.
Common Furring Strip Widths
Width affects the amount of surface available for fastening.
Common widths include approximately:
- 1-1/2 inches
- 2-1/2 inches
- 3-1/2 inches
A wider furring strip may make it easier to install fasteners while also providing more support beneath panel joints.
For example, a wider strip can be useful when two boards or panels meet directly over the same fastening location.
Furring Strip Size by Application
| Application | Common Starting Size | Main Purpose |
|---|---|---|
| Interior wall panels | 1 × 2 | Creates fixing surface |
| Basement wall finishing | 1 × 2 or 2 × 2 | Provides offset and mounting surface |
| Ceiling panels | 1 × 2 or 1 × 3 | Creates level fixing plane |
| Exterior siding | Project-specific | Supports cladding system |
| Masonry wall | 1 × 2 or larger | Creates attachment surface |
| Insulation support | Project-specific | Holds or spaces insulation |
| Roof assemblies | Project-specific | Creates fixing or ventilation space |
| Decorative walls | 1 × 2 | Creates mounting surface |
| Service cavity | 2 × 2 or larger | Provides installation depth |
The listed sizes are general starting points rather than universal construction specifications.
Why Are Furring Strips Used?
Furring strips solve several common construction problems.
Creating a Flat Surface
Concrete, masonry, and existing walls may not provide a perfectly level plane.
Furring strips can establish a more consistent surface for finishing materials.
Providing a Fastening Surface
Some wall materials cannot be conveniently fastened directly to masonry or another unsuitable substrate.
A wood furring strip gives installers a material into which screws or other fasteners can be secured.
Creating a Cavity
A furring system can create space behind the finished surface.
This cavity may be used for:
- Insulation
- Wiring
- Pipes
- Ventilation
- Moisture-management strategies
- Acoustic treatments
The cavity’s required depth depends on what is being installed inside it.
Furring Strip Spacing Guide
Furring strip spacing depends heavily on the material being installed over the strips.
There is no single spacing measurement that works for every application.
For example, lightweight decorative panels may have different support requirements from heavy exterior cladding.
When determining spacing, consider:
- Panel dimensions
- Panel thickness
- Panel weight
- Fastener location
- Manufacturer requirements
- Expected loads
- Substrate condition
- Local construction requirements
A common approach is to arrange furring strips so that panel edges and fasteners have adequate support.
Furring Strip Layout for Wall Panels
When installing wall panels over furring strips, careful layout is important.
The strips should provide support at the locations where the panel needs to be attached.
Before installation:
- Measure the wall.
- Mark the furring locations.
- Determine panel dimensions.
- Identify panel joints.
- Make sure joints align with adequate support.
- Check the wall for level and plumb.
- Install the strips.
- Recheck the surface before attaching panels.
A small layout mistake can become much more noticeable after large panels are installed.
Furring Strips Over Concrete Walls
Concrete and masonry walls often present challenges because ordinary wood screws cannot always be used directly without appropriate anchors or fastening systems.
Wood furring strips can create a practical mounting surface.
Typical installation involves:
- Positioning the strips
- Checking alignment
- Marking anchor locations
- Drilling the substrate where appropriate
- Installing suitable anchors or fasteners
- Leveling the strips
- Attaching the finished wall material
The appropriate fastening system depends on the substrate and the weight of the finished assembly.
Furring Strips for Basement Walls
Furring strips can be used in basement finishing systems, but moisture management is especially important in below-grade spaces.
Before installing wood:
- Check for water intrusion.
- Address leaks and dampness.
- Inspect the wall condition.
- Consider the complete insulation system.
- Follow applicable moisture-control requirements.
Wood installed against a damp masonry surface can develop problems if moisture is trapped.
The correct wall assembly should be designed as a complete system rather than treating the furring strips as an isolated component.
Furring Strips for Ceilings
Furring strips can also be installed on ceilings to create a consistent surface for attaching drywall, panels, or other ceiling finishes.
Ceiling applications may require special attention to:
- Existing framing
- Ceiling flatness
- Material weight
- Fastener spacing
- Electrical fixtures
- Plumbing
- Required clearance
The furring system must provide adequate support for the selected ceiling material.
Furring Strips for Exterior Walls
Exterior furring can be used as part of certain siding and cladding systems.
Depending on the assembly, furring may help provide:
- A fastening surface
- A drainage cavity
- A ventilation space
- Separation from the substrate
- Alignment for cladding
Exterior assemblies must account for moisture movement and drainage.
The required furring dimensions and spacing should follow the cladding manufacturer’s instructions and applicable building requirements.
Furring Strips for Insulation
Furring can sometimes be used to create space for insulation or to support insulation materials.
The correct size depends on the thickness and type of insulation.
For example, a shallow furring system may be suitable for a thin insulation layer, while thicker insulation may require deeper framing.
However, insulation performance is determined by the complete wall or ceiling assembly, not simply by the depth of the furring strip.
Wood Species Used for Furring Strips
Furring strips can be made from several types of wood.
Pine Furring Strips
Pine is commonly selected because it is easy to cut, drill, and fasten.
It can work well for many interior applications.
Spruce Furring Strips
Spruce can provide a lightweight option for suitable construction applications.
The grade and condition of the lumber should be considered before installation.
Fir Furring Strips
Fir is another option for construction and support applications where its characteristics are appropriate.
Cedar Furring Strips
Cedar may be useful for selected exterior or moisture-exposed applications because of its natural durability characteristics.
The specific species and treatment should match the intended exposure.
Wood Furring vs Metal Furring
Furring strips are not always made from wood.
Metal furring systems are also available and may be preferred in certain construction environments.
| Feature | Wood Furring | Metal Furring |
|---|---|---|
| Material | Timber | Metal |
| Cutting | Simple woodworking tools | Metal-cutting tools |
| Fastening | Screws, nails, anchors | Screws or specialized fasteners |
| Moisture behavior | Can absorb moisture | Generally unaffected by rot |
| Adjustability | Easy to shim and modify | System-specific |
| Availability | Widely available | Depends on market |
| Common use | Walls, ceilings, panels | Drywall and commercial systems |
The best choice depends on the project, substrate, environmental conditions, and installation system.
Also Read:
How to Choose the Right Furring Strip Size
Choosing a furring strip should begin with the function it needs to perform.
Determine Required Cavity Depth
If the strips are being used to create space behind a wall finish, calculate the required cavity before choosing the lumber.
For example, if the assembly requires a deeper service space, a nominal 1 × 2 may not provide enough depth.
Consider the Fasteners
The strip must be thick and wide enough to accommodate the intended fasteners.
Check:
- Fastener length
- Fastener diameter
- Edge distance
- Substrate
- Material thickness
Consider the Finished Surface
Think about how the furring strips will affect the final position of the wall or ceiling.
Adding a thicker furring layer can move the finished surface farther into the room.
Furring Strip Installation Methods
The installation method depends on the substrate.
Installation Over Wood Framing
Wood furring can usually be attached to framing using appropriate fasteners.
Make sure the strips are aligned and adequately supported.
Installation Over Masonry
Masonry applications generally require appropriate anchors or masonry fasteners.
The fastener must be compatible with:
- Concrete
- Brick
- Block
- Furring material
- Finished wall system
Leveling Uneven Walls
If the underlying wall is uneven, installers may use shims or adjust the furring system to create a more consistent plane.
The final surface should be checked repeatedly during installation.
Furring Strip Size and Fastener Selection
The furring strip and fastener work together as part of the installation system.
A suitable fastener should provide adequate penetration into the furring material and substrate without damaging the strip.
Avoid placing fasteners too close to board ends or edges when doing so could cause splitting.
For masonry applications, the anchor must also be appropriate for the type and condition of the substrate.
How to Measure a Furring Strip
Measuring a furring strip is straightforward.
Measure Thickness
Measure the narrow dimension across the strip.
Do not assume the nominal dimension is the actual thickness.
Measure Width
Measure the broad face from one edge to the other.
Measure Length
Measure from end to end.
For long strips, inspect both ends for damage or cuts.
Record the dimensions in this format:
Thickness × Width × Length
For example:
3/4 × 1-1/2 × 96 inches
represents a common actual size corresponding approximately to nominal 1 × 2 × 8-foot lumber.
Furring Strip Size Chart in Inches
| Nominal Size | Actual Thickness | Actual Width |
|---|---|---|
| 1 × 2 | 3/4 in | 1-1/2 in |
| 1 × 3 | 3/4 in | 2-1/2 in |
| 1 × 4 | 3/4 in | 3-1/2 in |
| 2 × 2 | 1-1/2 in | 1-1/2 in |
| 2 × 3 | 1-1/2 in | 2-1/2 in |
| 2 × 4 | 1-1/2 in | 3-1/2 in |
These are common dimensional lumber measurements after surfacing.
Furring Strip Size Chart in Feet
Furring strips can be purchased in different lengths depending on the supplier.
Common lumber lengths include:
| Nominal Cross Section | Common Length Range |
|---|---|
| 1 × 2 | 6–20 ft |
| 1 × 3 | 6–20 ft |
| 1 × 4 | 6–20 ft |
| 2 × 2 | 6–20 ft |
| 2 × 3 | 6–20 ft |
| 2 × 4 | 6–24 ft |
Actual availability varies by lumber supplier, species, grade, and market.
How Many Furring Strips Do You Need?
The quantity depends on the wall or ceiling dimensions and the selected spacing.
For a simple estimate, divide the installation width by the desired center-to-center spacing and account for the starting and ending strips.
For example, if a wall is 120 inches wide and strips are planned at 16-inch centers:
120 ÷ 16 = 7.5
The actual layout would require adjustment to account for the first strip, final strip, edges, openings, and the specific finished material.
It is better to prepare a complete layout before purchasing lumber.
Also Read:
Common Furring Strip Sizes for DIY Projects
For many basic DIY projects, nominal 1 × 2 lumber is a convenient starting point.
It can be useful for:
- Decorative wall panels
- Lightweight mounting surfaces
- Small shelving supports
- Craft projects
- Simple ceiling applications
- Wall leveling
For deeper cavities or applications requiring more substantial material, nominal 2 × 2 or larger lumber may be considered.
Common Mistakes When Using Furring Strips
Assuming a 1 × 2 Is Actually 1 × 2 Inches
This is perhaps the most common sizing mistake.
Always account for the actual finished dimensions.
Using the Wrong Spacing
Spacing should be compatible with the material being installed over the furring.
Ignoring Wall Moisture
Wood should not be installed in an environment where persistent moisture can cause deterioration without an appropriate assembly and protection strategy.
Failing to Check Level
Uneven furring can transfer directly to the finished wall or ceiling.
Using Inappropriate Fasteners
The fastener must work with both the furring strip and the substrate.
Not Accounting for Finished Wall Thickness
Adding furring changes the final position of the wall surface. This can affect:
- Door frames
- Window trim
- Electrical boxes
- Baseboards
- Cabinets
- Room dimensions
Tips for Installing Furring Strips Properly
For a cleaner installation:
- Measure the entire surface before beginning.
- Mark all strip locations.
- Use a level or laser where appropriate.
- Check the substrate before drilling.
- Select fasteners for the specific substrate.
- Keep strips straight.
- Shim uneven areas where appropriate.
- Leave appropriate clearances around openings.
- Verify spacing before installing the finished material.
- Follow the manufacturer’s installation requirements for the material being supported.
For exterior or moisture-sensitive assemblies, pay particular attention to drainage and ventilation requirements.
Furring Strip Size Comparison
| Size Category | Approx. Actual Size | Typical Function |
|---|---|---|
| Narrow | 3/4 × 1-1/2 in | Light-duty furring |
| Medium | 3/4 × 2-1/2 in | Wider fastening surface |
| Wide | 3/4 × 3-1/2 in | Broad support surface |
| Square | 1-1/2 × 1-1/2 in | Deeper furring |
| Heavy | 1-1/2 × 2-1/2 in or larger | More substantial support |
Furring Strip vs Batten
The terms furring strip and batten can sometimes describe similar-looking pieces of lumber, but their functions may differ.
A furring strip is generally associated with creating a mounting surface, leveling surface, cavity, or offset.
A batten can serve as a support or fixing strip and is often used in roofing, cladding, decorative walls, or other applications.
The actual dimensions may overlap, but the required size should always be determined by the specific application.
Furring Strip vs Stud
Furring strips and wall studs are not automatically interchangeable.
A wall stud is normally part of the primary framing system and can be designed to carry structural loads.
A furring strip is generally used to modify or prepare an existing surface for another material.
Using a small furring strip where structural framing is required can create an unsafe assembly.
If a component is intended to carry structural loads, its size must be determined using the appropriate structural design criteria.
Final Thoughts on Furring Strip Sizes
Furring strips are useful components in many wall, ceiling, roof, cladding, insulation, and remodeling projects. Although they are relatively simple pieces of lumber, choosing the correct dimensions can have a major effect on the finished assembly.
Common options such as 1 × 2, 1 × 3, 1 × 4, and 2 × 2 cover many general-purpose applications. However, the correct size depends on the required cavity depth, fastening surface, material weight, spacing, substrate, moisture conditions, and overall construction system.
Always distinguish between nominal and actual dimensions. A nominal 1 × 2 commonly measures approximately 3/4 × 1-1/2 inches after surfacing.
For ordinary interior projects, common dimensional lumber may be sufficient. More specialized applications, including roofing, exterior cladding, insulation assemblies, and structural systems, should follow the relevant manufacturer’s specifications, design requirements, and local building regulations.
By measuring carefully, planning the layout, selecting suitable fasteners, and considering the complete assembly, you can choose furring strips that provide a reliable and properly aligned foundation for the finished surface.